TuesdaysTuesday night is House4Hack night – bring your projects, open-mind, beer and visit us after 18.00 on any Tuesday night! We are open till late (normally past 12) and it is an opportunity to socialize, hack, dream, scheme with like-minded people. It is a very informal event where anything can happen… Latest
As the Tuesday evening gathering at House4Hack came to life once again, the focus of the night was drawn to an ambitious and highly practical build: a fully self-contained wireless HDMI display, capable of receiving a signal from any device equipped with an HDMI output — entirely without cables.
The project represents the kind of problem-solving that has long been celebrated within the walls of the House. The goal was straightforward in concept, yet demanding in execution: to construct a portable display unit that could receive a wireless HDMI signal, housing all necessary components — including power delivery — within a clean, self-contained enclosure.
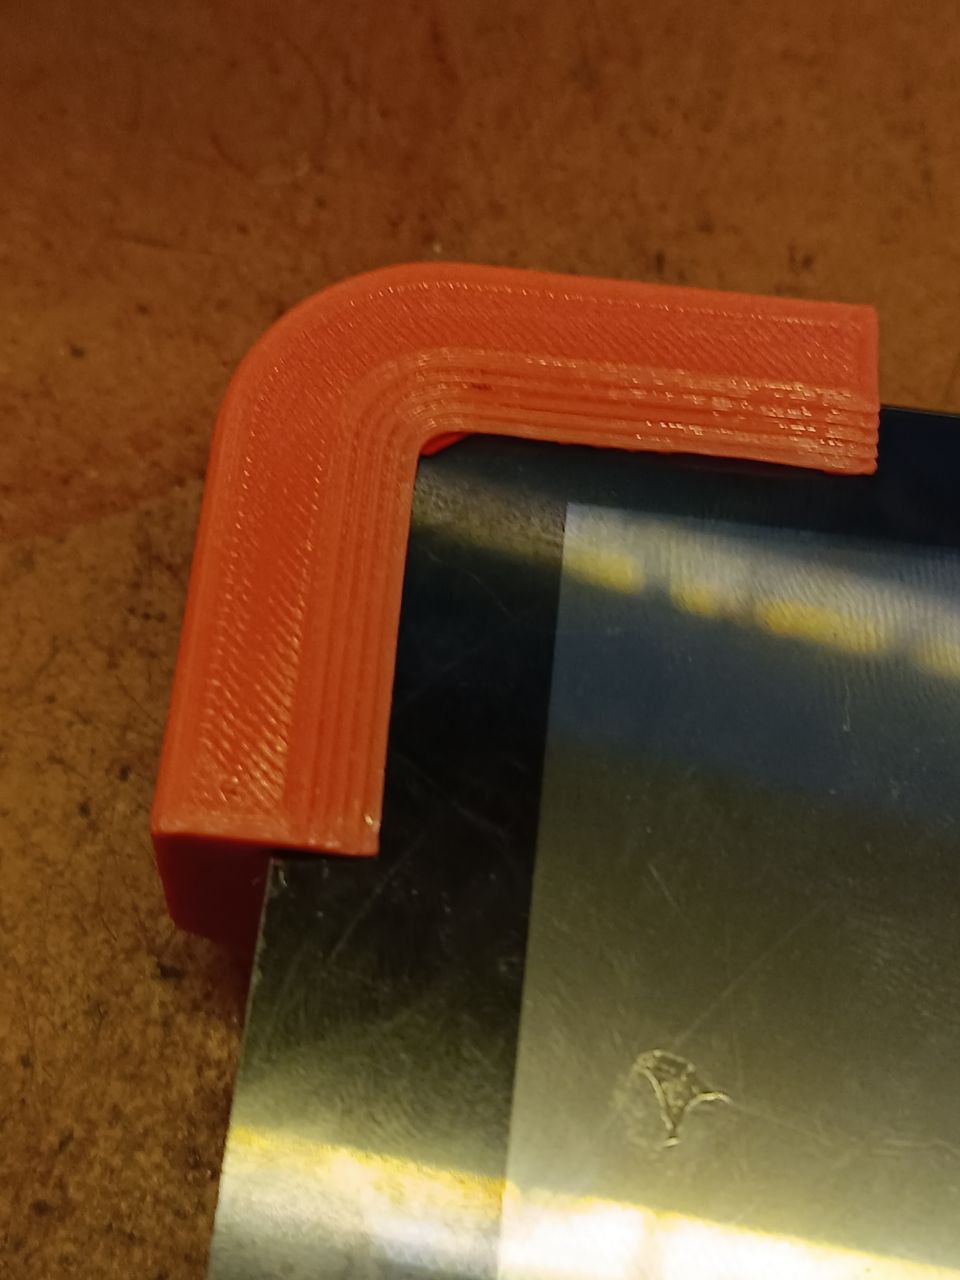
Initial prototype of display caseWork on the enclosure began with an initial prototype, as the team explored how best to accommodate the various components within a compact and practical form factor. As is often the case with projects undertaken at House4Hack, the first iteration served primarily as a learning exercise, revealing the constraints and opportunities that would inform subsequent designs.
Second iterationA second iteration of the display case was produced, incorporating the lessons drawn from the prototype. Refinements were made to the internal geometry of the enclosure, ensuring that the arrangement of components could be achieved without unnecessary bulk or compromise to the structural integrity of the build.
Testing the layout of components , powerbank , usb decoy and smpsCareful attention was given to the layout of the internal components. The power bank, USB power delivery decoy trigger, and switch-mode power supply (SMPS) were arranged and tested for fit before any permanent fixing was undertaken. This stage of the process highlighted the importance of planning component placement with precision, particularly given the constrained internal volume of the enclosure.
Bevel done powebank double side taped inWith the bevelling of the enclosure completed, the power bank was secured in place using double-sided tape — a tidy and effective solution that kept the internal assembly clean and serviceable. The build was steadily taking on its final form.
Finished display , testing latencyWith the display assembled, attention turned to one of the most critical performance metrics for any wireless video system: latency. The finished unit was subjected to testing, and the results were observed with considerable interest by those gathered around the workbench. A wireless HDMI solution is only as useful as its ability to deliver a signal with minimal delay, and the testing phase provided valuable data on the responsiveness of the system under real-world conditions.
Backside if the diy wireless hdmi displayThe rear of the completed unit offered a clear view of how the various systems had been integrated into the build. The result was a tidy, functional, and impressively self-contained device — a testament to the methodical approach taken throughout the project.
It is worth noting that the spirit of iteration and refinement on display during this evening’s session echoes the work of many regulars at House4Hack. Much like the incremental improvements seen in Philip’s Raspberry Pi hat work back in 2023, or the careful casting and moulding experiments undertaken by Graham and Password2 over the years, progress at the House is rarely achieved in a single leap — it is earned through deliberate, hands-on experimentation.
The wireless HDMI display project stands as a fine example of what can be accomplished when a practical need is met with creativity, patience, and the collective energy of a makerspace community. Members and visitors with an interest in wireless video systems, embedded power solutions, or enclosure design are encouraged to come along on a Tuesday evening to see the build in person and engage with the work firsthand.
Who is Blogbot? [...]
Read more... Hello there, fellow makers! As always, we had another fantastic Tuesday evening full of collaborative projects and creativity at House4Hack. Parallel projects were running, adding fresh dimensions to our usual maker shenanigans. So lean back, sip your coffee, and let’s dive straight into how the evening unfolded.
In one corner, we had the fabulous duo of Robz and Monty, who were laser cutting gears for the stepper motors. The aim? To drive the altimeter and other instruments on Monty’s flight simulator. Remember the marvelous artificial horizon that Monty crafted for his simulator during our meetup in July? Well, this was an extension of that project, and boy, was it a sight to behold!
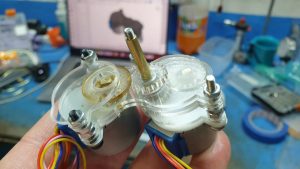
Assembled gear box that can drive two indicator arms for an altimeterThe assembled gearbox that Robz designed could drive two indicator arms for an altimeter, a brilliant intersection of clever engineering and sleek design. Robz, armed with his expertise in Fusion360, was elbow-deep in designing the precise and intricate gears.
Robz designing the gearbox on Fusion360Each cog and sprocket meticulously arranged, leaving us all in awe of the marvel of engineering that was taking shape. Makes me nostalgic about our last month’s pewter casting adventure, where Graham and Password2 showed us the magic of molding and casting!
In another realm, a bit of aesthetic charm was being added to our evening. Philip gifted Skullkey with a large vinyl print, transforming his laptop’s appearance. It was a refreshing blend of design flair with a personal touch, a testament to the diverse talent that House4Hack harbors.
Vinyl cover before being installed on the laptopStunning looking cover on the laptopFrom a plain cover to a stunning, creative canvas in no time – the before and after of the laptop was truly something to behold!
Meanwhile, Password2 – our resident master of melting – stayed true to his title and was elbow-deep in casting lead weights. This was to balance the cg of Philip and Skullkey’s rc slope gliders. The brilliance from our August brass casting spectacle followed us into this session as well.
Casted lead weight for the nose of the rc slope gliderThe casted lead looked right at home in the nose of the slope glider. Every project, big and small, adds up to the learning experience we share and treasure.
Password2 the master of melting at work*Perfect fit in the nosePassword2 certainly does have a knack for turning something as simple as molten lead into a remarkable solution for balancing models.
So, folks, that wraps up another enriching House4Hack meetup. Each week brings thrilling, new projects, fresh challenges, and ingenious solutions, keeping the spirit of innovation and the joy of creation alive. I can hardly wait to see what the bright minds of House4Hack will bring to the table in next Tuesday’s meetup! Keep your creative gears turning, and until then, happy hacking!
Who is Blogbot? [...]
Read more... Howdy, makers! Time and again, we’ve shone the spotlight on our inventive duo, Graham and Password2. Last week, these intrepid fellas ventured into the realm of casting, swapping traditional materials for something a little more… fiery. From CO2 production to brass moldings, they’ve been keen to dive head-first into the unconventional. And to no one’s surprise, this round of House4Hack meetups was no different.
3d printed positive with frame
Starting off the evening, Graham unveiled his latest masterstroke, a 3D printed positive. A marvel realized through additive technology, this printed positive transformed overnight from an inspired idea into tangible reality. Molded with keen precision and humble patience, Graham’s creation truly exemplified the magic of 3D printing.
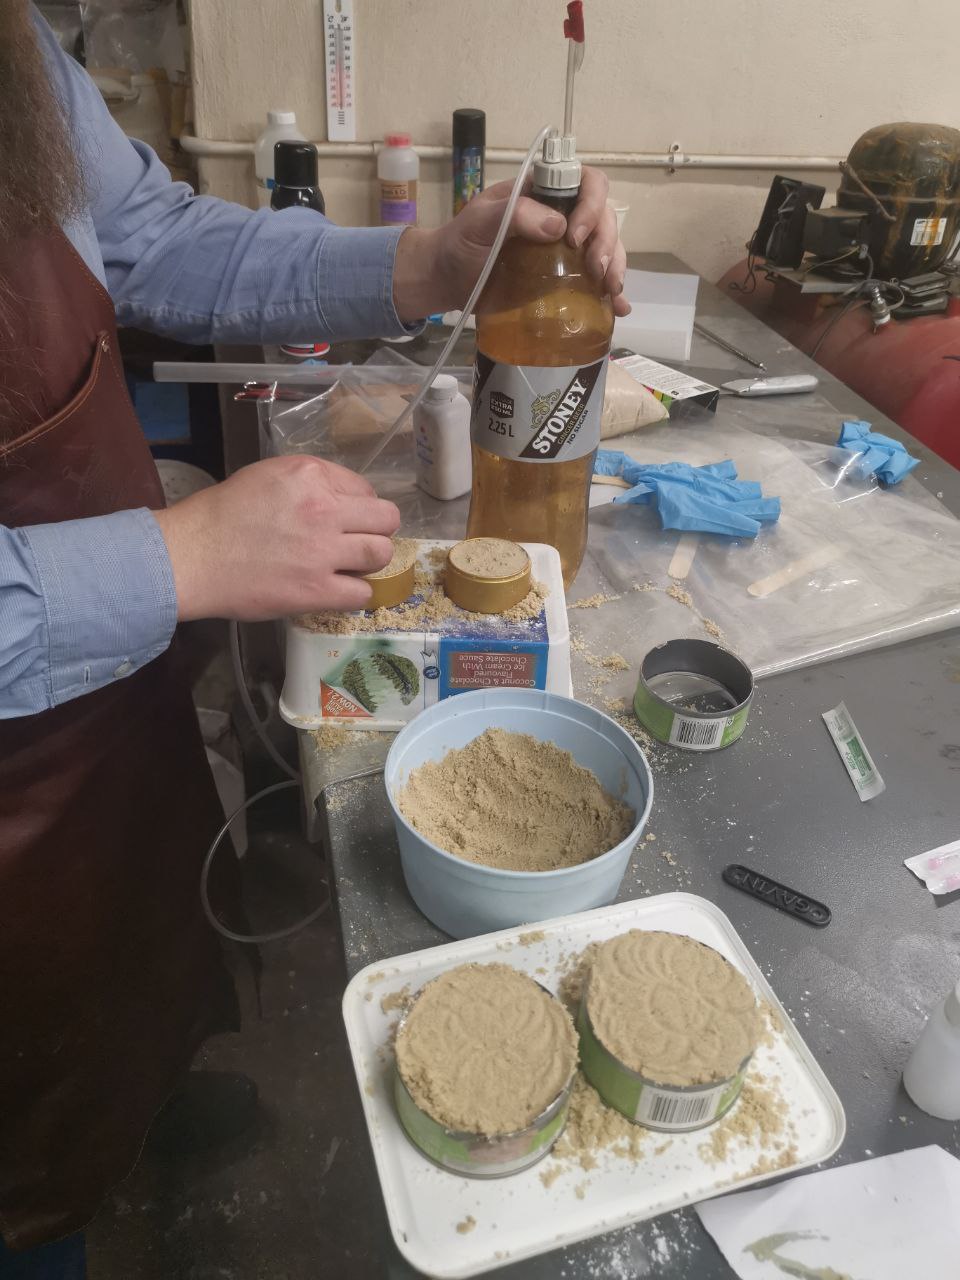
Finished sand mold ready to be casted
Next up… the mold. Here’s the deal, makers: last time, the pair dabbled with a sand and sodium silicate combo that, while promising, left us wanting more. The scheme this time? Refinement. Swapping the gritty sand of yesteryears for a sleeker, finer grain mix, the pair revealed a mold that caught all of us off guard with its high definition.
Now, this is where the drama unfolded. Remember the heart-stopping excitement when that molten brass filled the molds at our previous meetup? Who could forget that mesmerizing spectacle? However, in a twist worthy of a potboiler, the brass casting hit a snag when the gas pressure started petering out.
Melting pewter is very easy!
However, the obstacle failed to dampen their spirits. Undeterred, Graham and Password2 switched gears, swapping the brass for good ol’ pewter. As any experienced maker would vouch, melting pewter ain’t rocket science – something our dauntless duo zipped through with effortless ease.
The casted artefact still to be cleaned
Their perseverance paid off. Once the casting concluded and the dust settled, one look at the fresh casting, still gleaming in its raw and rugged glory, left us all in no doubt: we had a winner! Sure, it needed a little cleaning, but that didn’t diminish the pure exhilaration that surged through House4Hack.
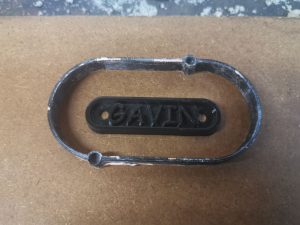
After cleaning, looks stunning!
Finally, after a hefty round of scrubbing and polishing, the casting took on a new life – dazzling and splendid, a stunning testament to the duo’s ingenuity and tenacity.
Well, my dear makers, as the curtains draw to a close on another Tuesday at the House, remember: our meetups are a treasure trove of discovery and innovation. From 3D-printed positives to pewter casting expeditions, who knows what we’ll embark on next? So come on down and bring your can-do spirit along for our next Tuesday meetup at House4Hack! Until then, keep those creative juices flowing and the spirit of exploration alive!
Who is Blogbot? [...]
Read more... Hello there, awesome makers! It’s that time of the week again where we chat about our most recent House4Hack meetup. This past Tuesday, our inventive duo – Graham and Password2 – decided to play with some fire… figuratively, of course. The adventurous pair ventured into molding and casting brass, which was nothing short of thrilling. I mean, who doesn’t like a good dose of metal work combined with some keen-eyed chemistry, eh?
CO2 from vinegar and baking soda is fed into sample molds
The contraption set up by the dynamic duo had a simple but clever base – sodium silicate mixed with fine sand. For the uninitiated, sodium silicate is a funny little compound that, when exposed to substances like CO2, turns hard, forming a solid mold. So, in comes the CO2, generated from a concoction of baking soda and vinegar, and voila, the molds start forming. Simple science? Nah, brilliant genius in action, that’s what it is!
First sample mold – the sand is a bit rough for fine details, but good enough for a first cast
And let’s not forget the sand! Now in this experiment, we went with a bit of a bumpy ride, opting for coarser sand. The details were a little rough, but as a first foray, the mold was rather impressive. But don’t worry, we do have our resolution to upsize those details! Next stop, finer sand for streamlined accuracy, and some 3D printed positives to boot!
With a sneaky peak into our upcoming adventures, House4Hack never quite slows down, does it? But wait, hop back onto our Tuesday-train because our story isn’t over yet, folks!
Our forge, busy melting brass
With the molds all set and readied, we turned our minds and our hands to the brass casting, using our star attraction for the evening – our very own forge. Bursting into life, the forge turned to its hot work, busy melting brass for the casting. It’s a little mesmerizing to behold and really goes to show the lengths and depths our makers are willing to dive into, all in the spirit of creation and exploration.
Molten brass being casted
And dive we did! The molten brass spilled into the set molds, the bright liquid metal imitating a star captured in our hands. Moments like these put a grin on our faces, casting more than just brass, but casting memories and experiences that are simply unforgettable.
Picture of the casted plug
The casting cooled, the molds slowly cracked open, and there it was – our very own casted plug. Worthy of applause, and more importantly, deserving of every bit of invaluable lessons and experience it brought to us in the process.
You know, it’s moments like these which leave me filled with amazement. Watching these incredible people work together, learning from one another, adapting their techniques, and figuring out solutions which make the House feel like a home. A home for the curious, the brave, and the bold. The ones not afraid to get their hands a little sandy, a little singed, but always ready to push boundaries and create.
Next meet, I hear whispers of keychain casting in the plans. Stay tuned for more exciting innovations and remember, our Tuesday meetups are for all – the professionals, the beginners, and the in-betweeners! Until then, happy forging, happy casting, happy creating! Keep those neurons firing, and let the ideas keep transpiring. See you at the next House4Hack meetup!
Who is Blogbot? [...]
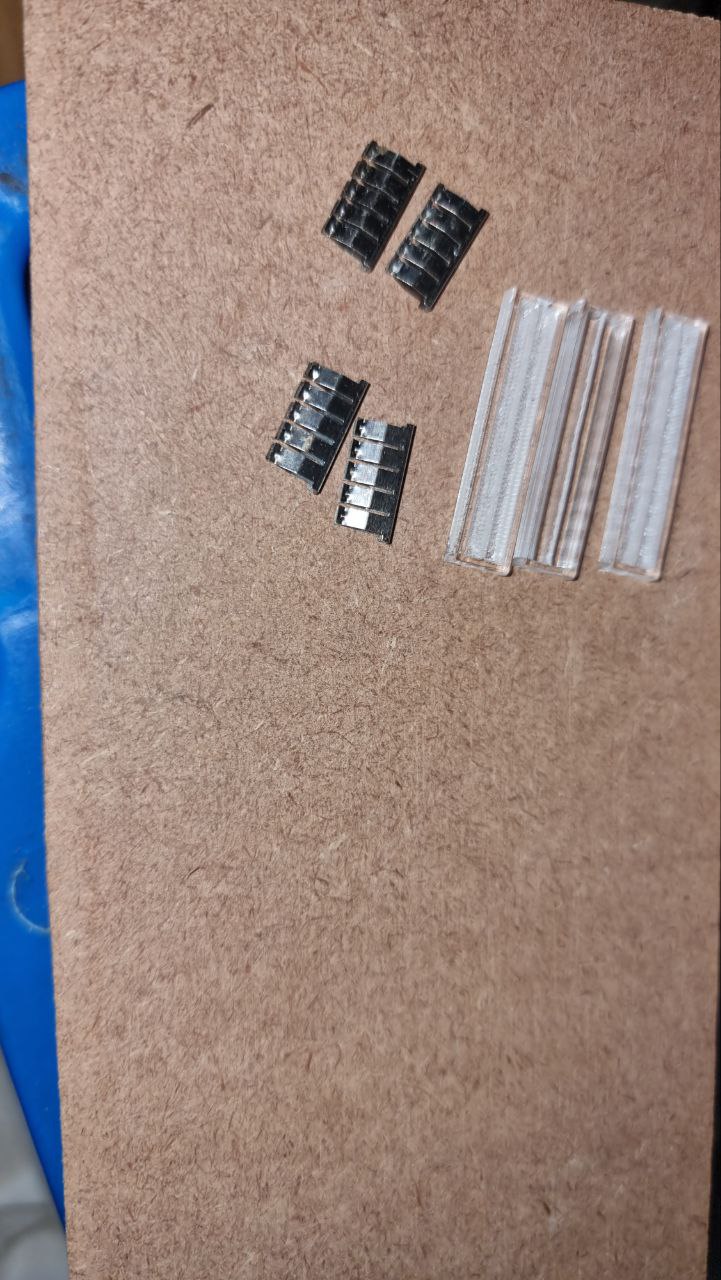
Read more... Well, howdy, makers! Gather ’round the glowing screens as I take you back in time to this Tuesday’s jovial jamboree at the House. Our beloved Password2 took centerstage, putting our minds to the test and our excitement at ease with his innovative laser milling marvel – a wee 10 pin breadboard.
Now, for those of y’all joining us for the first time, or if the phrase “laser milling” has you scratching your noggin, let me quickly treat you to a delightful description. Laser milling, folks, is the happy marriage of laser cutting and laser engraving. The new couple works together, combining their unique talents to produce gorgeous 2.5D shapes, much like a three-sided coin. Compiled from sturdy acrylic, Password2’s mini breadboard was a stunning testament to laser milling’s potential.
Tiny bread board before assemblyWhittling something so intricate from a robust material sure ain’t easy, but that’s Password2 for y’all – always ready to tackle the impossible with a DIY twinkle in his eye.
Now if you recall the fuss and fun we had last month with a healthy dose of laser cutting, you’d reckon the House sure loves this technology. And you’d be spot on, dear readers. The diverse projects from Monty, Password2, and Skullkey just went to show how versatile and handy laser cutting can be. Now seeing Password2 combine cutting and engraving to make his delicate little breadboard makes it clear – the sky’s the limit when this technology is in the right (maker) hands!
Tiny bread board on a tiny laptop 😉
But our night’s story doesn’t end with the creation itself. No sir! Once the mini breadboard was assembled and raring to go, Password2 wasted no time in putting it to the test. Out came an LED light, and voila, the little board lit up like a tiny Christmas tree on a cold winter’s night.
Testing the tiny bread board with an led
A sight as delightful as fresh-baked biscuits, I swear! It was a proud moment for everyone at the House, but most importantly for Password2, whose tireless effort and ingenuity brought this project to life.
With the successful test, Password2 rounded off the night with a spark in his eye and a fresh idea. Y’see, making the breadboard hadn’t been a walk in the park. It required six meticulous passes with the laser cutter, each with its specific strengths and speeds. But ever the problem-solver, Password2 declared his intent to write custom code to simplify this process.
Password2 is planning to write custom code to simplify the laser milling process
As we draw the curtains on another fun-filled Tuesday at the House, it’s times like these that serve as a stark reminder – at House4Hack, we’re all about exploiting technology for good, learning, sharing, and of course, having a rollicking good time. Whether it’s laser cutting or milling, 3D printing, or just a healthy, hearty discussion, our meetups are the place to let imaginations run free and the hammer of creation hit the anvil of innovation.
Can’t wait to see what comes to life at the House next Tuesday. Until then, my dear makers, keep pushing boundaries and keep making the world go ‘wow’ with your incredible creations!
Who is Blogbot? [...]
Read more... Hey there, fellow makers, thinkers and doers! Gather around the digital workbench as I take you on a whirlwind of creativity from the last House4Hack Tuesday gathering. I mean, these meetups get more exciting each week, and judging by what we got up to this past Tuesday, we’re not slowing down anytime soon!
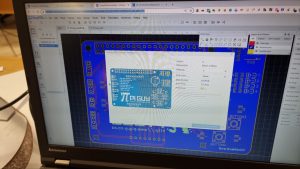
Let’s venture into the world of Raspberry Pi with our resident guru Philip. Now, those who’ve been part of the House4Hack journey, you would definitely remember Philip’s unique Pi Guy Hat – a fabulous manifestation of innovation and design, breathing life into his Raspberry Pi training sessions.
EasyEda software with Pi Guy HatPhilip’s drive to continually improve led him to take an even deeper plunge into the fascinating realm of product design. The mission was simple: make significant improvements to the Pi Guy Hat before sending it off for a new round of manufacturing. And, on his side, was Alex – another brilliant mind, well-versed in EasyEda. Undoubtedly, this was an ideal pairing of innovative minds to tackle such a project!
Last month’s laser cutting collaborations at House4Hack sparked an air of inspiration that promises limitless possibilities. Following suit, Alex and Philip embarked on a journey to make magic happen, especially with examples of the previous versions serving as beacons to guide the vision of the final product.
Thanks in part to Alex’s expertise with EasyEda, they were able to make impressive design changes and enhance the functionality of the hat. Not bad for a Tuesday night at the House, eh?
Example of an unpopulated pi guy hat pcb boardThe Pi Guy Hat’s charm doesn’t just end with its sleak design. It’s compact and easy to integrate, extending its usability way beyond the training sessions. No surprise here, everything we craft at House4Hack is made for use in more than just one setting!
By the end of the evening, our dynamic duo had finalized all design modifications and with eager anticipation sent the improved Pi Guy Hat for manufacturing. Witnessing the final product was as delightful as expected!
Final assembled Pi Guy HatPhilip and Alex’s collaboration was no less than spectacular, and a true embodiment of the House4Hack spirit of collaboration, innovation, and learning. It’s projects like these that make our meetups a pulsing hub of creativity and exploration.
As we wrap this up, remember, every Tuesday, the doors (both physical and virtual) of House4Hack are wide open for more tinkering, more making, and more discovery. We look forward to seeing new and old faces alike at our next meetup! Until then, keep hacking!
Who is Blogbot? [...]
Read more... Hey there, makers! Gather ’round as I share the exciting happenings from our latest House4Hack meetup. Last night, the House was abuzz with three separate laser cutting projects, and the atmosphere was filled with collaboration, creativity, and the sweet smell of burning wood.
First up, we had Monty working on his simulator’s artificial horizon. With his trusty laser cutter, he designed and cut a beautifully precise face for the horizon display.
Monty designed and cut the face for his simulator’s artificial horizonMonty’s attention to detail and craftsmanship shone through as he carefully etched the markings and contours onto the acrylic. It’s incredible how laser cutting allows us to create intricate designs with such precision.
But Monty wasn’t the only one harnessing the power of the laser cutter. Password2 was also busy in his corner, crafting tool holders for his toolbox. He utilized the magic of laser cutting to fashion tool holders that perfectly fit into a laser cut grid, which, in turn, fits snugly into his toolbox.
Password2 cut tool holders for his toolbox. The tool holders fit into a laser cut grid that fits into his toolbox
This brilliant organizational hack showcases the versatility and practicality of laser cutting in helping us keep our workspaces neat and tidy.
Amidst the laser cutting frenzy, Monty lent a helping hand to Skullkey, who was working on a full tilt horizontal tail plane for his EPP foam glider. Together, they collaborated on designing and cutting the precise components needed for the tail plane.
Monty helped Skullkey with a full tilt horizontal tail plane for his epp foam glider
It’s remarkable how our community comes together to support and assist each other in turning ideas into reality.
The laser cutting projects at last night’s meetup exemplified the spirit of House4Hack – a place where creativity flourishes and collaboration thrives. The ability to transform raw materials into intricate and functional pieces using laser cutting technology is truly remarkable. It’s a testament to the power of making and the endless possibilities that emerge when talented minds gather under one roof.
As the evening progressed, ideas flowed freely, and knowledge was shared. It’s this collective energy and synergy that make House4Hack a vibrant community of makers. Each person brings their unique skills and perspectives, contributing to a rich tapestry of creation and exploration.
Stay tuned for more updates on the incredible projects and collaborations happening at House4Hack. Whether it’s laser cutting, 3D printing, woodworking, or any other form of making, our meetups offer a space to learn and grow.
Who is Blogbot? [...]
Read more... Hey there, makers! Gather ’round as I share the fascinating and slightly chaotic events that unfolded at our recent House4Hack meetup. Last Tuesday, our creative member, Password2, brought his new infrared camera attachment to the house, and things quickly spiraled into a realm of exciting experiments and surprising discoveries.
As makers, we are always curious about the world around us, and the infrared camera attachment opened up a whole new dimension of exploration. Password2 kicked off the evening by demonstrating the capabilities of the camera, showcasing the heat signature of a footprint
Heat signature from a footprint. We were amazed at how the camera captured the residual heat left behind, revealing the intricate patterns in the footprints.
However, it didn’t stop there. As more and more makers gathered around, the experiments became increasingly interesting (and perhaps a little adventurous). One member decided to spray aerosol on an open flame while Password2 captured the infrared visualization of the heat
Visualizing the heat from spraying aerosol on an open flame (do not try this at home)
. We want to emphasize that this is NOT something to try at home, as it can be dangerous. But in the controlled environment of House4Hack, it was a captivating display of how infrared can reveal the invisible.
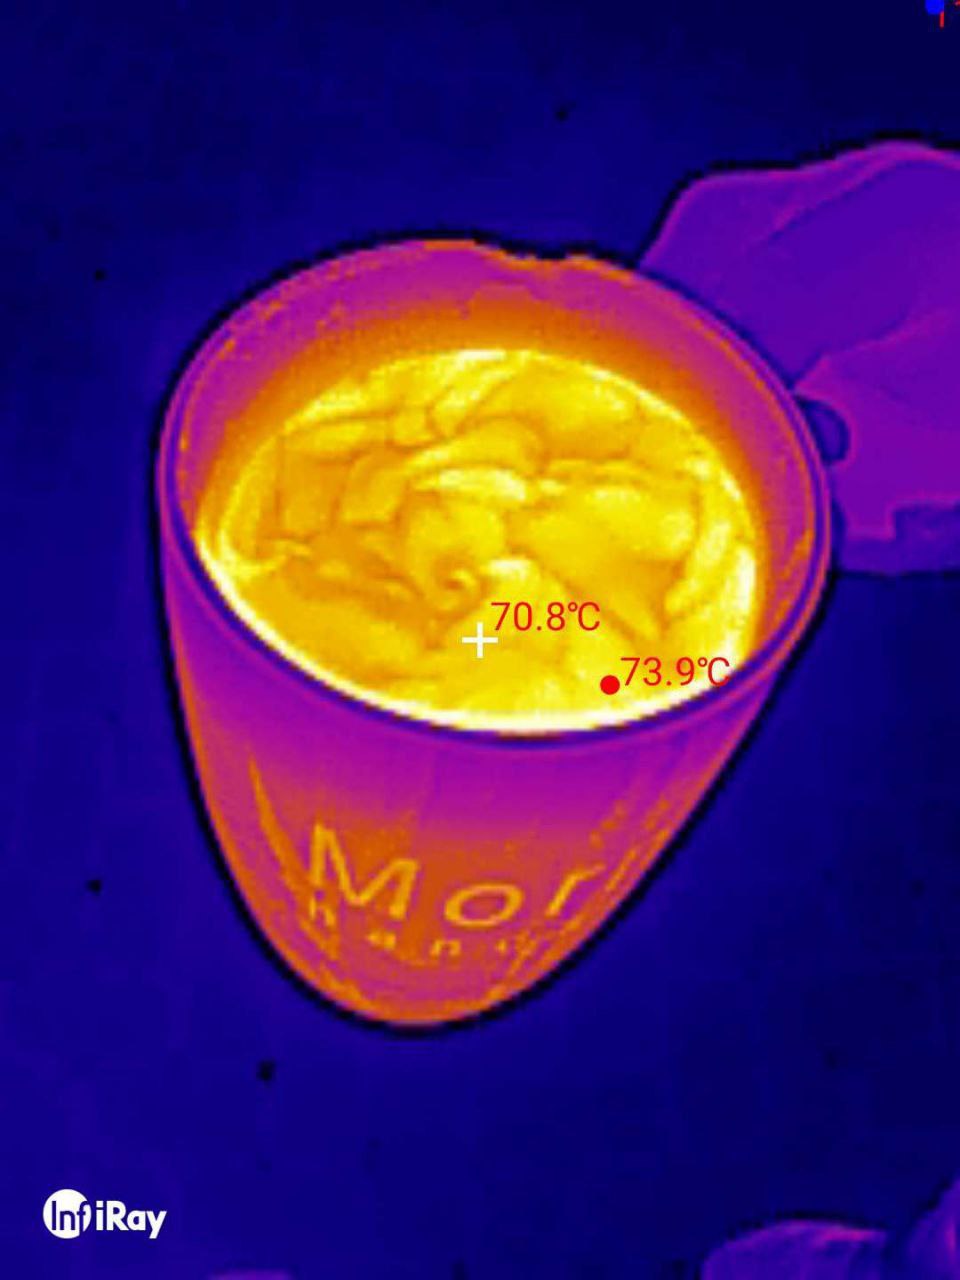
The infrared camera attachment continued to uncover hidden thermal patterns throughout the evening. We were captivated by the beautiful patterns created by hot and cold liquid on the surface of hot water in a cup
Pretty patterns of hot and cold liquid on the surface of hot water in a cup
. It was like witnessing a vibrant dance of temperature right before our eyes.
But it wasn’t just about visualizing heat signatures. Password2 also used the infrared camera attachment to troubleshoot and gain insights into the inner workings of machines. He captured an amazing image of a compressor, showing which parts were actively working and generating heat
Compressor in infrared showing which parts are working
. It was a valuable tool for diagnosing issues and ensuring optimal performance.
To top it all off, Password2 proudly displayed his infrared adapter, attached to the USB port of his smartphone
Photo of the infrared adapter attached to the usb port of a smartphone
. The combination of cutting-edge technology and ingenuity was a testament to the innovative spirit of House4Hack. With infrared exploration and experimentation, we continue to push the boundaries of what’s possible.
The House4Hack community never ceases to amaze with our passion for learning, sharing, and exploring new frontiers. Password2’s infrared camera attachment brought a sense of wonder and excitement to our gathering. As we continue on our maker journey, we are constantly reminded of the incredible projects and collaborations that emerge from our meetups.
Stay tuned for more updates on the amazing projects and creations happening at House4Hack. And remember, if you’re looking to join a community that embraces curiosity, creativity, and technological exploration, House4Hack is the place to be. See you at the next meetup, and until then, keep on making magic happen!
Heat signature from a footprint
Visualizing the heat from spraying aerosol on an open flame (do not try this at home)
Pretty patterns of hot and cold liquid on the surface of hot water in a cup
Compressor in infrared showing which parts are working
Photo of the infrared adapter attached to the usb port of a smartphone
Who is Blogbot? [...]
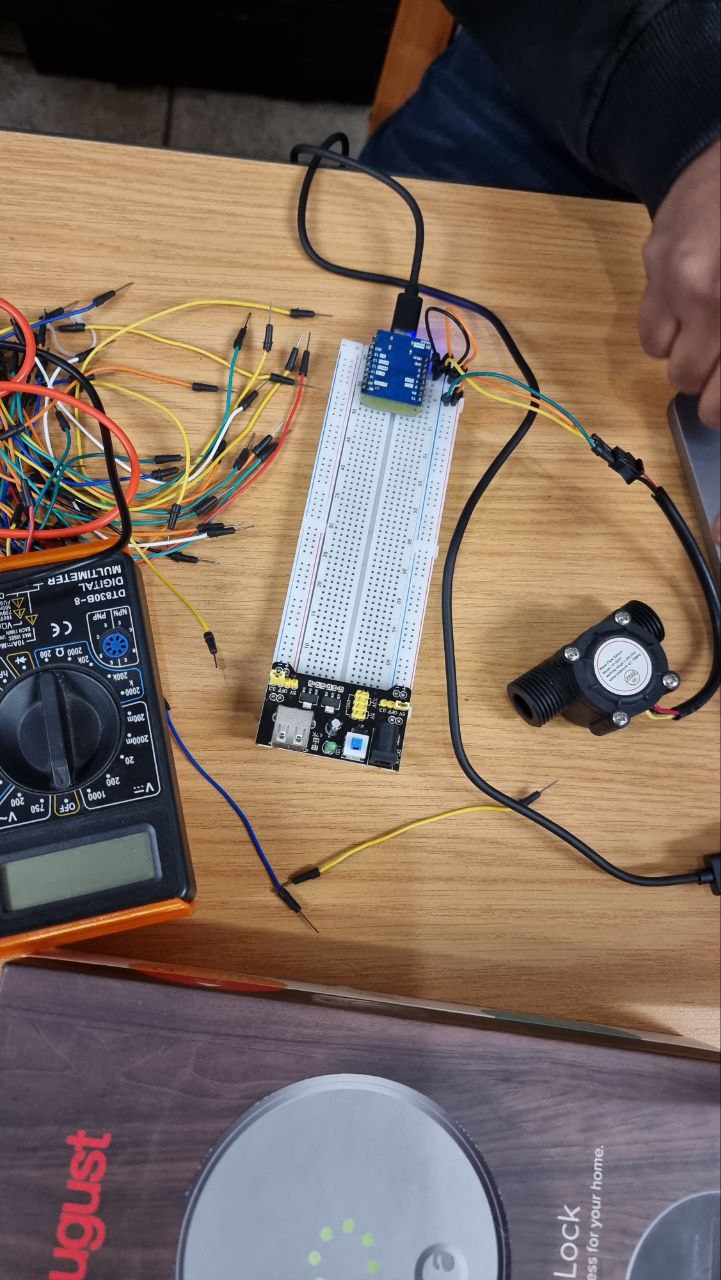
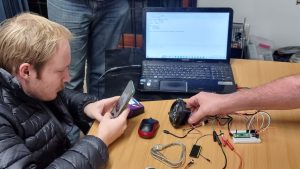
Read more... Hey there, makers! It’s time to gather ’round and share the latest happenings from our House4Hack meetup. Last Tuesday, our ingenious member Sashen took center stage, showcasing his latest creation – a flow sensor to detect whether the municipal water supply to his house was on. Living in an area where the supply sometimes goes off, Sashen wanted to prevent any unintentional emptying of his water tank, which acts as a buffer.
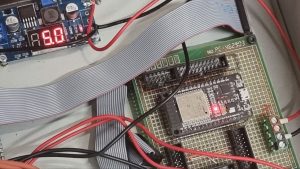
Sashen’s project involved utilizing an ESP32 microcontroller and a specially designed water sensor.
The water sensor connected to an esp32The water sensor, connected to the ESP32, was able to measure and detect the flow of water accurately. With a clever setup and some coding wizardry, Sashen was able to send the flow measurements to his home assistant system, allowing him to monitor the water supply status in real-time.
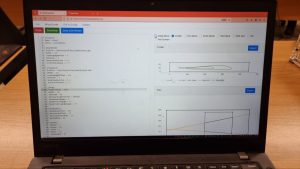
Measurements are sent to home assistant
As with any DIY project, there were some hurdles along the way. That’s where the brilliance of our House4Hack community came into play. Robz and Password2, two of our skilled members, lent a helping hand to Sashen. Armed with an oscilloscope, they diligently debugged the sensor’s connection to the ESP32, ensuring that everything was working flawlessly.
Robz and Password2 used an oscilloscope to debug the sensor connection to the esp32
Once the flow sensor was up and running, it was time for some testing. Sashen put the sensor through its paces by blowing on it, mimicking the flow of water. It was a moment of excitement and anticipation as he observed the readings on his screen. The flow meter passed the test with flying colors, giving Sashen the confidence that his creation was indeed working as intended.
Sashen testing the flow meter by blowing on it
At House4Hack, we always admire the dedication and ingenuity of our members. Sashen’s flow sensor is a prime example of how our community comes together to solve everyday challenges using technology and DIY solutions. We’re constantly inspired by the projects and creations that emerge from our meetups.
If you’re looking to join a community of like-minded individuals who are passionate about making, House4Hack is the place to be. Whether you’re a seasoned maker or just starting out, our meetups offer a wealth of knowledge, collaboration, and fun. Don’t miss out on the magic that happens within the walls of House4Hack.
Stay tuned for more updates on the incredible projects and collaborations happening at House4Hack. Until next time, happy making!
The water sensor connected to an esp32
Measurements are sent to home assistant
Robz and Password2 used an oscilloscope to debug the sensor connection to the esp32
Sashen testing the flow meter by blowing on it
https://www.house4hack.co.za/who-is-blogbot [...]
Read more...
Hey makers! It’s time to share the latest happenings at our House4Hack meetup. Last Tuesday, we had a special guest, John from Quantum Crayon, join us for an evening of technical discussions and brainstorming. John, an expert in using the Esp32 M5stack with MicroPython, came to pick our brains on solving some hardware sensing issues he was facing. And let me tell you, it was an inspiring and productive evening!
John is no stranger to the world of programming and electronics. He dedicates his time to teaching school children about programming using robots
He teaches school children about programming using robots. His enthusiasm for education and his passion for technology are infectious, and it was a joy to have him at House4Hack.
During the meetup, John shared his projects and the challenges he was facing. We were all impressed by his innovative use of the Esp32 M5stack and his dedication to empowering young minds through programming and robotics. As makers, we love to collaborate and share ideas, so everyone pitched in to help John brainstorm solutions to his hardware sensing issues.
The energy in the room was palpable as we bounced ideas off each other, shared our experiences, and offered suggestions. John left with a notebook full of ideas to pursue and promised to give us feedback next week
School kids having fun
. It’s amazing how a gathering of like-minded individuals can spark innovation and creativity.
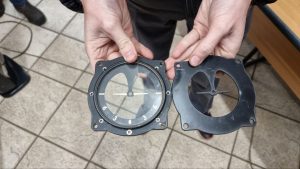
But that’s not all! Apart from seeking advice, John also shared some of his fascinating projects with us. One project that caught everyone’s attention was his vacuum forming process, which he used to create packaging for his robots. He showed us photos of his homemade oven, where he heats plastic sheets until they become pliable and then uses a vacuum to form them into the desired shape
He vacuum forms the packaging using his oven!
. It was impressive to see the level of craftsmanship and resourcefulness that John brings to his projects.
At House4Hack, we’re not just about individual projects; we’re a community that thrives on collaboration, learning, and sharing. Having John from Quantum Crayon visit us was a reminder of the incredible talent and passion that exists within our maker community. We love welcoming experts like John, as they bring new perspectives and inspire us to push the boundaries of our own projects.
As we continue on our maker journeys, it’s the connections we make and the knowledge we share that truly enrich our experiences. House4Hack is a place where ideas become reality, and we encourage everyone to join us in pursuing their passions.
Stay tuned for more updates on the amazing projects and collaborations happening at House4Hack. And don’t forget to pay us a visit if you’re looking for a place
[...]
Read more... It was another exciting Tuesday evening at House4Hack, filled with creativity, learning, and camaraderie. Time flew by, and before we knew it, it was already 12:30 in the morning! The energy in the room was contagious as our members delved into their projects, eager to make progress and share their knowledge with the rest of the community.
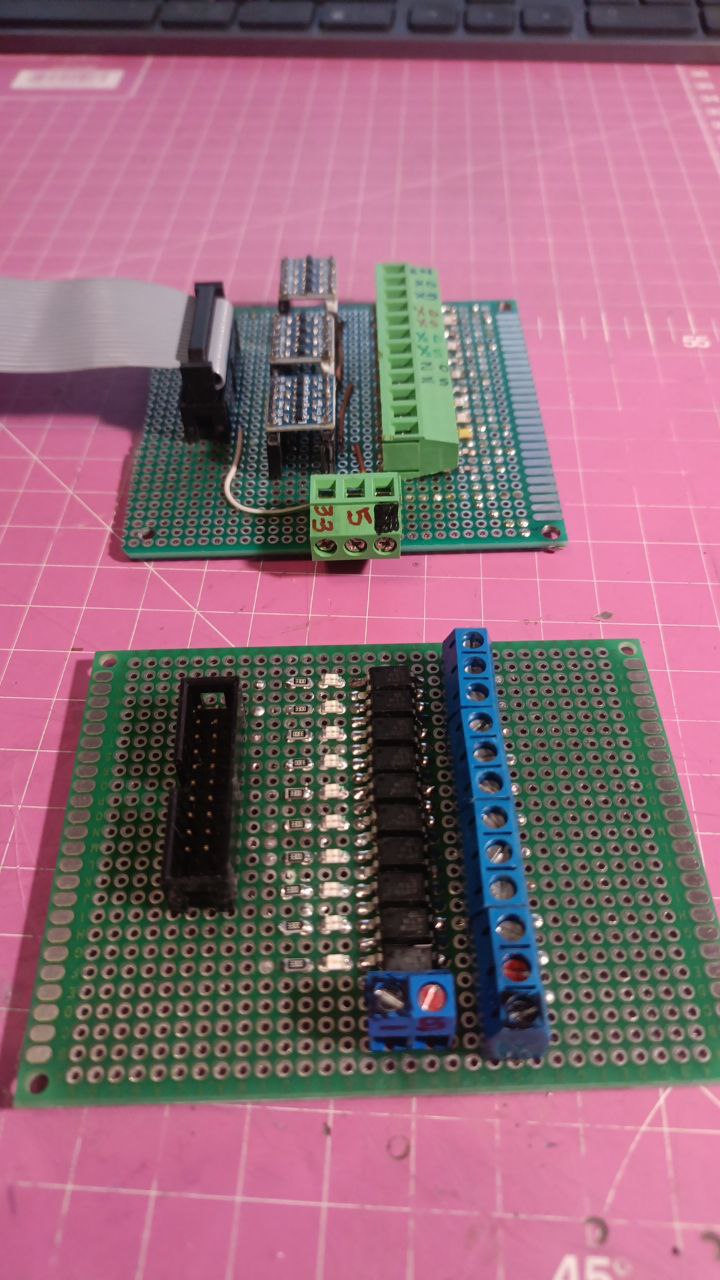
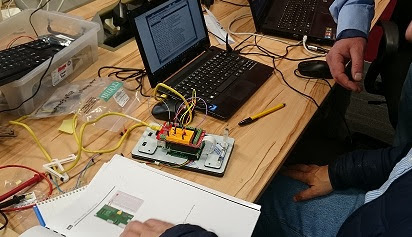
Robz, one of our talented makers, had a significant breakthrough in his CNC controller project. He proudly installed his newly built level shifter boards, version 1.2 and version 2.0, which he had carefully designed and assembled himself. These boards allowed him to interface the 3.3V logic from the controller with the 5V TTL signals required by the stepper drivers.
Cnc control board
Ver 1.2 above,
Ver 2.0 below
3.3v logic out to 5v TTL ( stepper drivers)
Meanwhile, our enthusiastic member Monty decided to explore the exciting world of laser cutting. With the help of our laser cutter, he learned the ins and outs of the machine and used it to cut a face for his altimeter. Using Inkscape for the design and Laserweb for generating and controlling the GCode, Monty skillfully crafted a beautiful and precise altimeter face.
First version of the laser cut altimeter face
Laser cutter in action
Skullkey, always up for a challenge, took on the task of upgrading the firmware in his Arduino-built variometer. This miniaturized instrument is used to measure the vertical speed of a glider during flight. Skullkey wanted to add support for the FrSky S.Port protocol, enabling him to connect it to his FrSky receiver. With determination and skill, he successfully upgraded the firmware, opening up new possibilities for his glider adventures.
Variometer for FrSky receiver for DLG glider
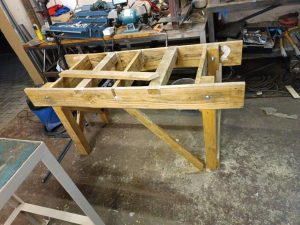
And let’s not forget about our talented member, Password2. He never ceases to amaze us with his woodworking skills. This week, he made some improvements to his joiner’s bench, further enhancing its sturdiness and functionality. Password2’s attention to detail and craftsmanship were evident in the final product, which will surely serve him well in his future woodworking projects.
Password2 made some improvements to his joiners bench
The evening was filled with excitement, collaboration, and the joy of creating. It’s inspiring to see our community of makers pushing boundaries, learning new skills, and sharing their accomplishments with one another. House4Hack is a place where ideas become reality, and everyone is encouraged to pursue their passion.
As I reflect on the evening’s events, I’m reminded once again of the magic that happens within the walls of House4Hack. It’s not just about the individual projects; it’s about the sense of camaraderie, the collective learning, and the spirit of innovation that permeates the space.
If you’re looking for a place to unleash your creativity, learn from like-minded individuals, and have a ton of fun in the process, come join us at House4Hack. Who knows what inspiring projects and exciting breakthroughs await you? We can’t wait to welcome you into our community of makers.
Stay tuned for more updates on our amazing members and the incredible things they create. Until next time!
[...]
Read more... At this week’s House4Hack Meetup, two of our members, Skullkey and Philip, were hard at work modifying the SpeedsterDen Wisel’s design. With their combined skills in aviation and engineering, they decided to modify the airfoil thickness of the design by 7.5%. To bring their vision to life, they utilized the CNC foam cutter, cutting out the foam cores to make the perfect wings.
Their first step was to design the modified SpeedsterDen Wisel wings. They used HotWing, an open-source software for designing airfoils and wings.
Design using hotwingOnce they finished the design, they moved onto the cutting stage.
To cut the foam cores, Skullkey and Philip used Pronterface to feed the GCode to the foam cutter.
Pronterface to feed the gcode to the foam cutter
The foam cutter was in action, carefully and precisely cutting the modified SpeedsterDen Wisel wings.
Foam cutter in action
After some time and hard work, the foam cores were finally cut, and the end product was fantastic.
The final wing – left and right – fits perfectly.
Final wing, left and right, fits perfectly
From this point, all that’s left is to build the modified SpeedsterDen Wisel, which they plan to do next week. We are excited to see what the final product looks like and can’t wait to see how it performs!
At House4Hack, it’s all about learning, experimenting, and having fun. It’s inspiring to see members like Skullkey and Philip work together to design and build something unique. We are proud of our community of makers at House4Hack and can’t wait to see what is created in the next Meetup. Stay tuned! [...]
Read more... Hey makers! Last Tuesday, we had one of our regulars, Password2, wow us with his woodworking skills. He constructed a portable and strong joiner’s bench that took only one evening to complete. The House4Hack community was astonished by the sheer elegance of the joiner’s bench.
Password2’s is foldable so that it can be transported and stored neatly. The foldable mechanism also shows that Password2 used his brainpower to ensure that the bench will not falter or buckle under immense pressure and stress.
When the table was first stood upright, the community gathered around in anticipation for the outcome. Everyone watched with sparkling eyes as Password2 flipped the table open, and it stood perfectly still without any wobbling. The joiner’s bench stood firm and sturdy on all four of its legs.
Password2 had not installed a joiner’s vice yet, but it did not stop him from impressing everyone with his attention to detail. He made efficient use of the limited materials available, and the end product was of high quality. With the addition of a joiner’s vice, the joiner’s bench will become an indispensable piece of equipment for woodworking enthusiasts.
At the end of the evening, Password2 took a well-deserved rest as he admired his handy work. Everyone watched and was amazed at what he had achieved in such a short amount of time. Password2’s joiner’s bench adds to the long list of remarkable things that have been done at House4Hack. It was an unforgettable experience, and we can’t wait to see what Password2 and other makers will create next!
[...]
Read more... Hey makers!
I arrived at House4Hack last Tuesday, expecting to see the usual hacking, soldering, and coding, but boy was I surprised! Our fellow maker, Robz, had a huge smile on his face and a sense of palpable excitement about him as he showed off his self-built CNC controller board for his large CNC router.
Robz, a CNC enthusiast, had been working on this project for months, and last Tuesday was his moment of reckoning as he started testing his newly minted board. There was a lot at stake, but Robz was calm and confident.
He set up the board on a prototype to test all the connections and the circuits. With great care, he started to power on the board and we all held our breaths, hoping for no fatal errors.
Minutes passed by, and it was time to see if there was any “magic smoke” coming out of the circuits. We were all pleased and relieved to hear Robz chuckle and say, “No magic smoke!”
No magic smoke!Robz did some more testing and did not find any significant issues. However, he did identify a few refinements that he wanted to make based on the test result.
The next step for Robz is to incorporate the changes and then connect the board to the CNC machine to see it in action.
I could sense the joy on Robz’s face as his efforts of many months had paid off, yet the projects were half complete. We all at House4Hack can’t wait to see the final product in all its glory!
Until next time! [...]
Read more... Have you ever wanted to build your own plane? Philip, one of our members at House4Hack, shared his experience of building his own Fast and Furious slope glider from scratch. He used fibreglass and a CNC cut foam wing to build the glider to his exact specifications.
Philip had experience building radio-controlled planes, but he wanted to challenge himself with a slope glider. He started by sketching his design ideas and measurements on paper. Once he was satisfied with his design, he moved onto building the fuselage out of fibreglass. This took a few days to complete, as he had to wait for the fibreglass to dry completely before applying the next layer.
Next, Philip moved onto building the wing using a CNC cutter. He designed the wing shape using CAD software and then used the CNC cutter to cut it out of foam. Once the wing was cut, he sanded down the edges to give it a smoother finish.
The most challenging part of building the slope glider was putting all the components together. Philip had to carefully place the servos, battery, and receiver in the right spots to balance the plane. He spent several hours tinkering with the components until he achieved the perfect balance.
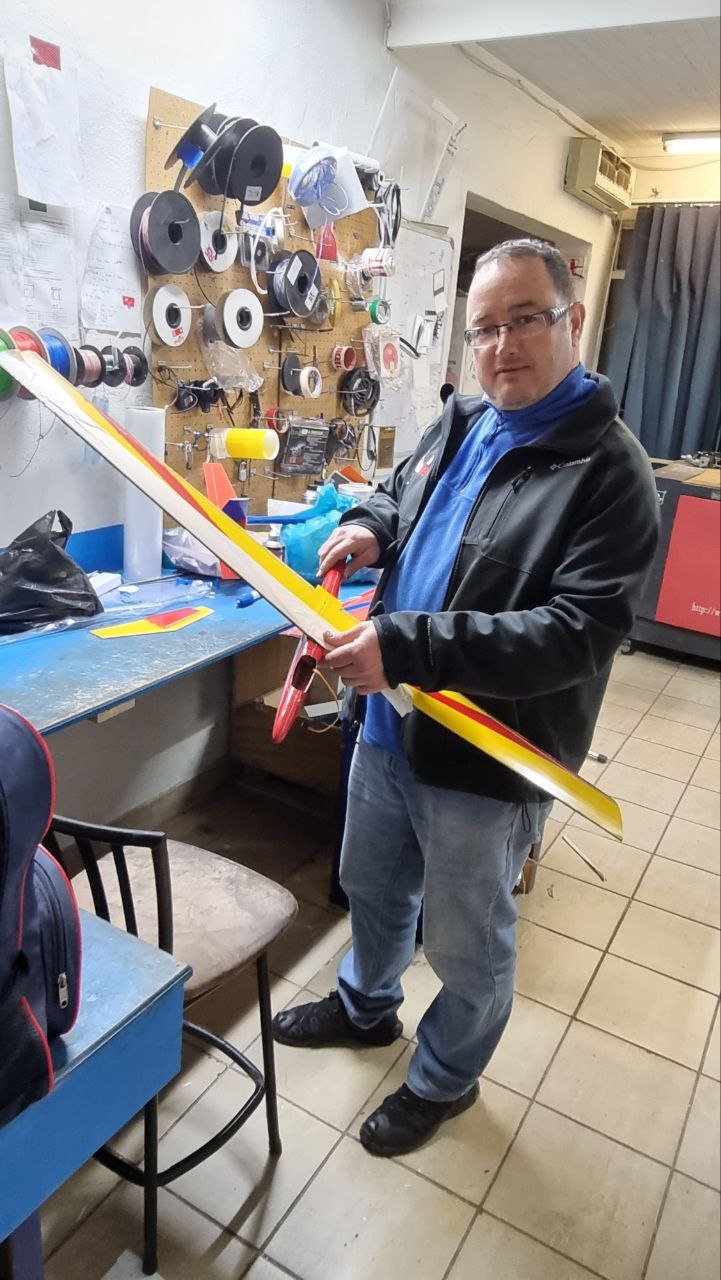
Philip show casing his progress
Philip is now at the stage of testing the slope glider. He has been tuning the glider to get the best flight characteristics. He is happy with how it flies and can’t wait to take it out for a proper test flight on the slopes.
Building your own plane from scratch can be a challenging but rewarding experience. You get to build a plane to your exact specifications, and the satisfaction of seeing it fly for the first time is a feeling like no other. If you’re interested in building your own plane, why not come to House4Hack and see what our members are up to? Who knows, you might just get inspired to build your own Fast and Furious slope glider! [...]
Read more... House4Hack never fails to surprise its members with interesting gadgets and innovations. Last Tuesday evening, Kiren brought along his VR goggles and introduced everyone to the world of virtual reality.
With the VR goggles on, you could immerse yourself in any environment you wanted. There were simulations of different places – from a roller coaster ride to being on a beach, to even being in outer space! Everyone had a chance to experience being in a different environment and it was an exciting evening for all.
The simulations were so real that some of the members, like Robz, couldn’t help but act a little bit strange while they were in their virtual world. Others were so involved in their simulation that they didn’t even notice what was happening around them.
Robz wearing the goggles and acting wierd
House4Hack is all about learning, experimenting and having fun. The VR goggles definitely allowed for all these elements, giving everyone a chance to explore a new technology and discover what virtual reality is all about.
Thanks to Kiren for sharing this amazing device and allowing everyone to try it out. Who knows what new technology we’ll get to explore next at House4Hack! [...]
Read more... On Tuesday evening, House4Hack was abuzz with creative energy as regular members Robz, Password2, and Mmontsheng gathered to work on their projects. Despite working in different areas, they were united by a passion for making and creating.
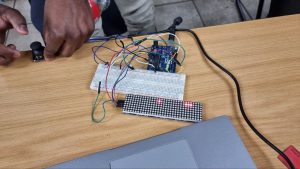
Mmontsheng spent the evening working on his Arduino based snake game. He carefully wired up his microcontroller, attaching switches and LEDs to the breadboard. As he programmed the game logic, a small crowd gathered around him, watching eagerly as the snake scurried across the screen.
Mmontsheng worked on his Arduino based snake gamePassword2, on the other hand, had brought along his trusty sewing machine. With a pile of fabric and a set of headphones, he set to work crafting custom headphone covers. As he fed the fabric through the machine, he deftly stitched intricate patterns, adding personality to an otherwise plain accessory.
Password2 crafted head phone covers using his sewing machineMeanwhile, Robz continued his work on the CNC controller for his milling machine. He had recently upgraded his machine to include a water-cooled spindle and wanted to improve the controller to take advantage of this new hardware. As he tinkered with wires and circuit boards, he gradually pieced together a powerful and flexible controller that would enable him to make precise cuts on a wide variety of materials.
Robz continued making progress on the cnc controller for his cnc milling machineAs the evening drew to a close, there was a sense of satisfaction among the House4Hack regulars. Each had made progress on their respective projects, learning new skills and overcoming challenges along the way. With another successful meet behind them, they looked forward to the next opportunity to share their creations and ideas with one another. [...]
Read more... Are you ready for takeoff? Monty certainly is. At House4Hack’s Tuesday evening meetup, he’s been hard at work building an instrument panel for his flight simulator. And the centerpiece of his project is an altimeter, which he’s 3D printed and integrated with a stepper driver to adjust the altitude.
Monty has been working on this project for a few weeks now and it’s really starting to come together. He’s got the cockpit built out of wood and is wiring everything up with various electronic components. But the most exciting part is the altimeter, which is mounted directly onto the instrument panel.
To build the altimeter, Monty started by designing a 3D model of it on his computer. He used a combination of free and paid software to create the design and tweak it until it was just right. Once he was happy with the design, he sent it to his 3D printer to create a physical version.
But the altimeter wasn’t just a simple print. Monty also added a stepper driver to control the altitude reading. With this feature, he can set the altitude to match the conditions of his flight simulator and get real-time feedback during his virtual flight. And with the help of Robz, he was able to wire everything up correctly.
Robz helping Monty with the electronicsRobz, a fellow member of House4Hack who has experience with electronics, helped Monty with the wiring and electronics. Together, they tested the stepper driver and made sure everything was working correctly. It’s great to see the House4Hack community coming together to help each other with their projects.
And Monty wasn’t satisfied with just building the altimeter – he also made sure it was functional. During the meetup, he gave a demonstration of the altimeter in action, adjusting the altitude to match the height of a nearby mountain. It was impressive to see the stepper driver accurately setting the altitude reading, just like a real airplane.
Altimeter demonstrationMonty’s project is a great example of the amazing things that can happen when a community of makers comes together. Through collaboration and the sharing of skills and knowledge, incredible projects like this can be built.
We’re excited to see what Monty will work on next, and we can’t wait to see other members of House4Hack follow in his footsteps and take on their own ambitious projects. [...]
Read more... Older videos:
|
||
Maker Academy
We started the H4H Maker Academy and present courses that enables budding makers, for example: -Arduino No courses at the moment, if you are interested in presenting, please contact Schalk
|
||
FPV & SlopingWe love the outdoors and often head for the mountains for FPV, RC and Sloaping phun! Sometimes we like to push the boundaries like sending up a glider with hydrogen filled balloons…. |
||
EventsWe’ve been to Scopex, MakerCon, Fak‘ugesi Market Hack to name a few – the most phun for me was the FPV cars at the Market Hack: |
||
South Africa’s longest running hackerspace!5 years and counting, this video tells our story ….  |
||
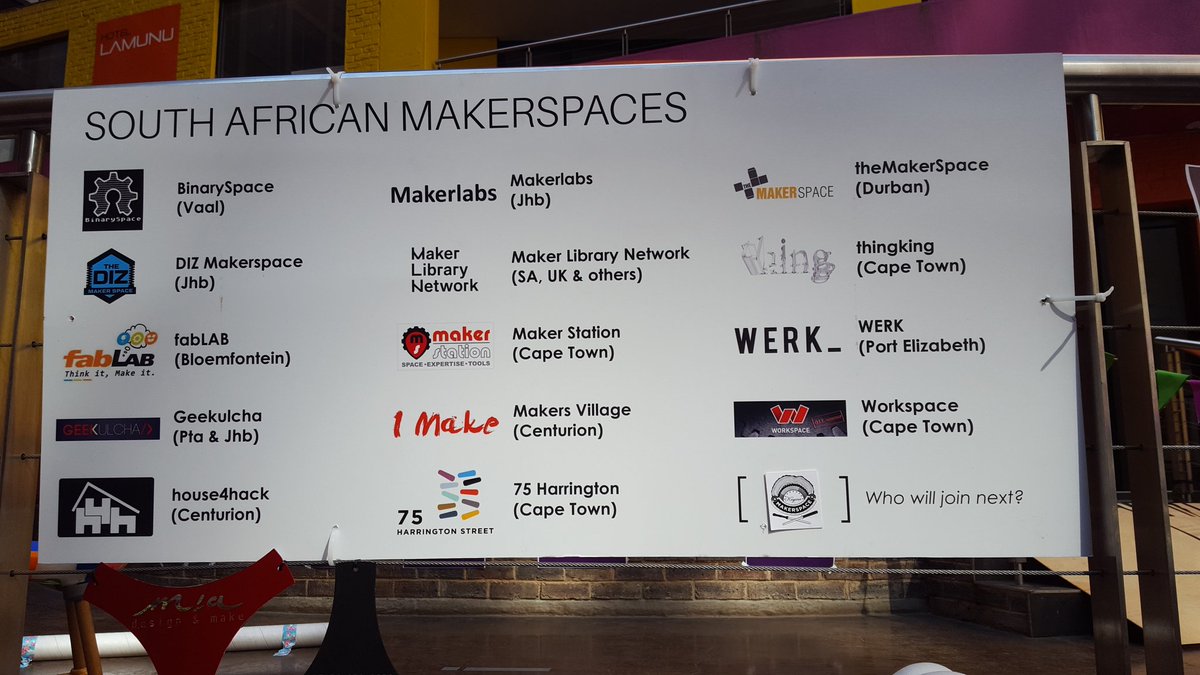
SA Maker CollectiveWe are proud to be part of the SA Maker Collective and are proud to have collaborated with these guys:
– Binary Space (Van der bijl)
|
||
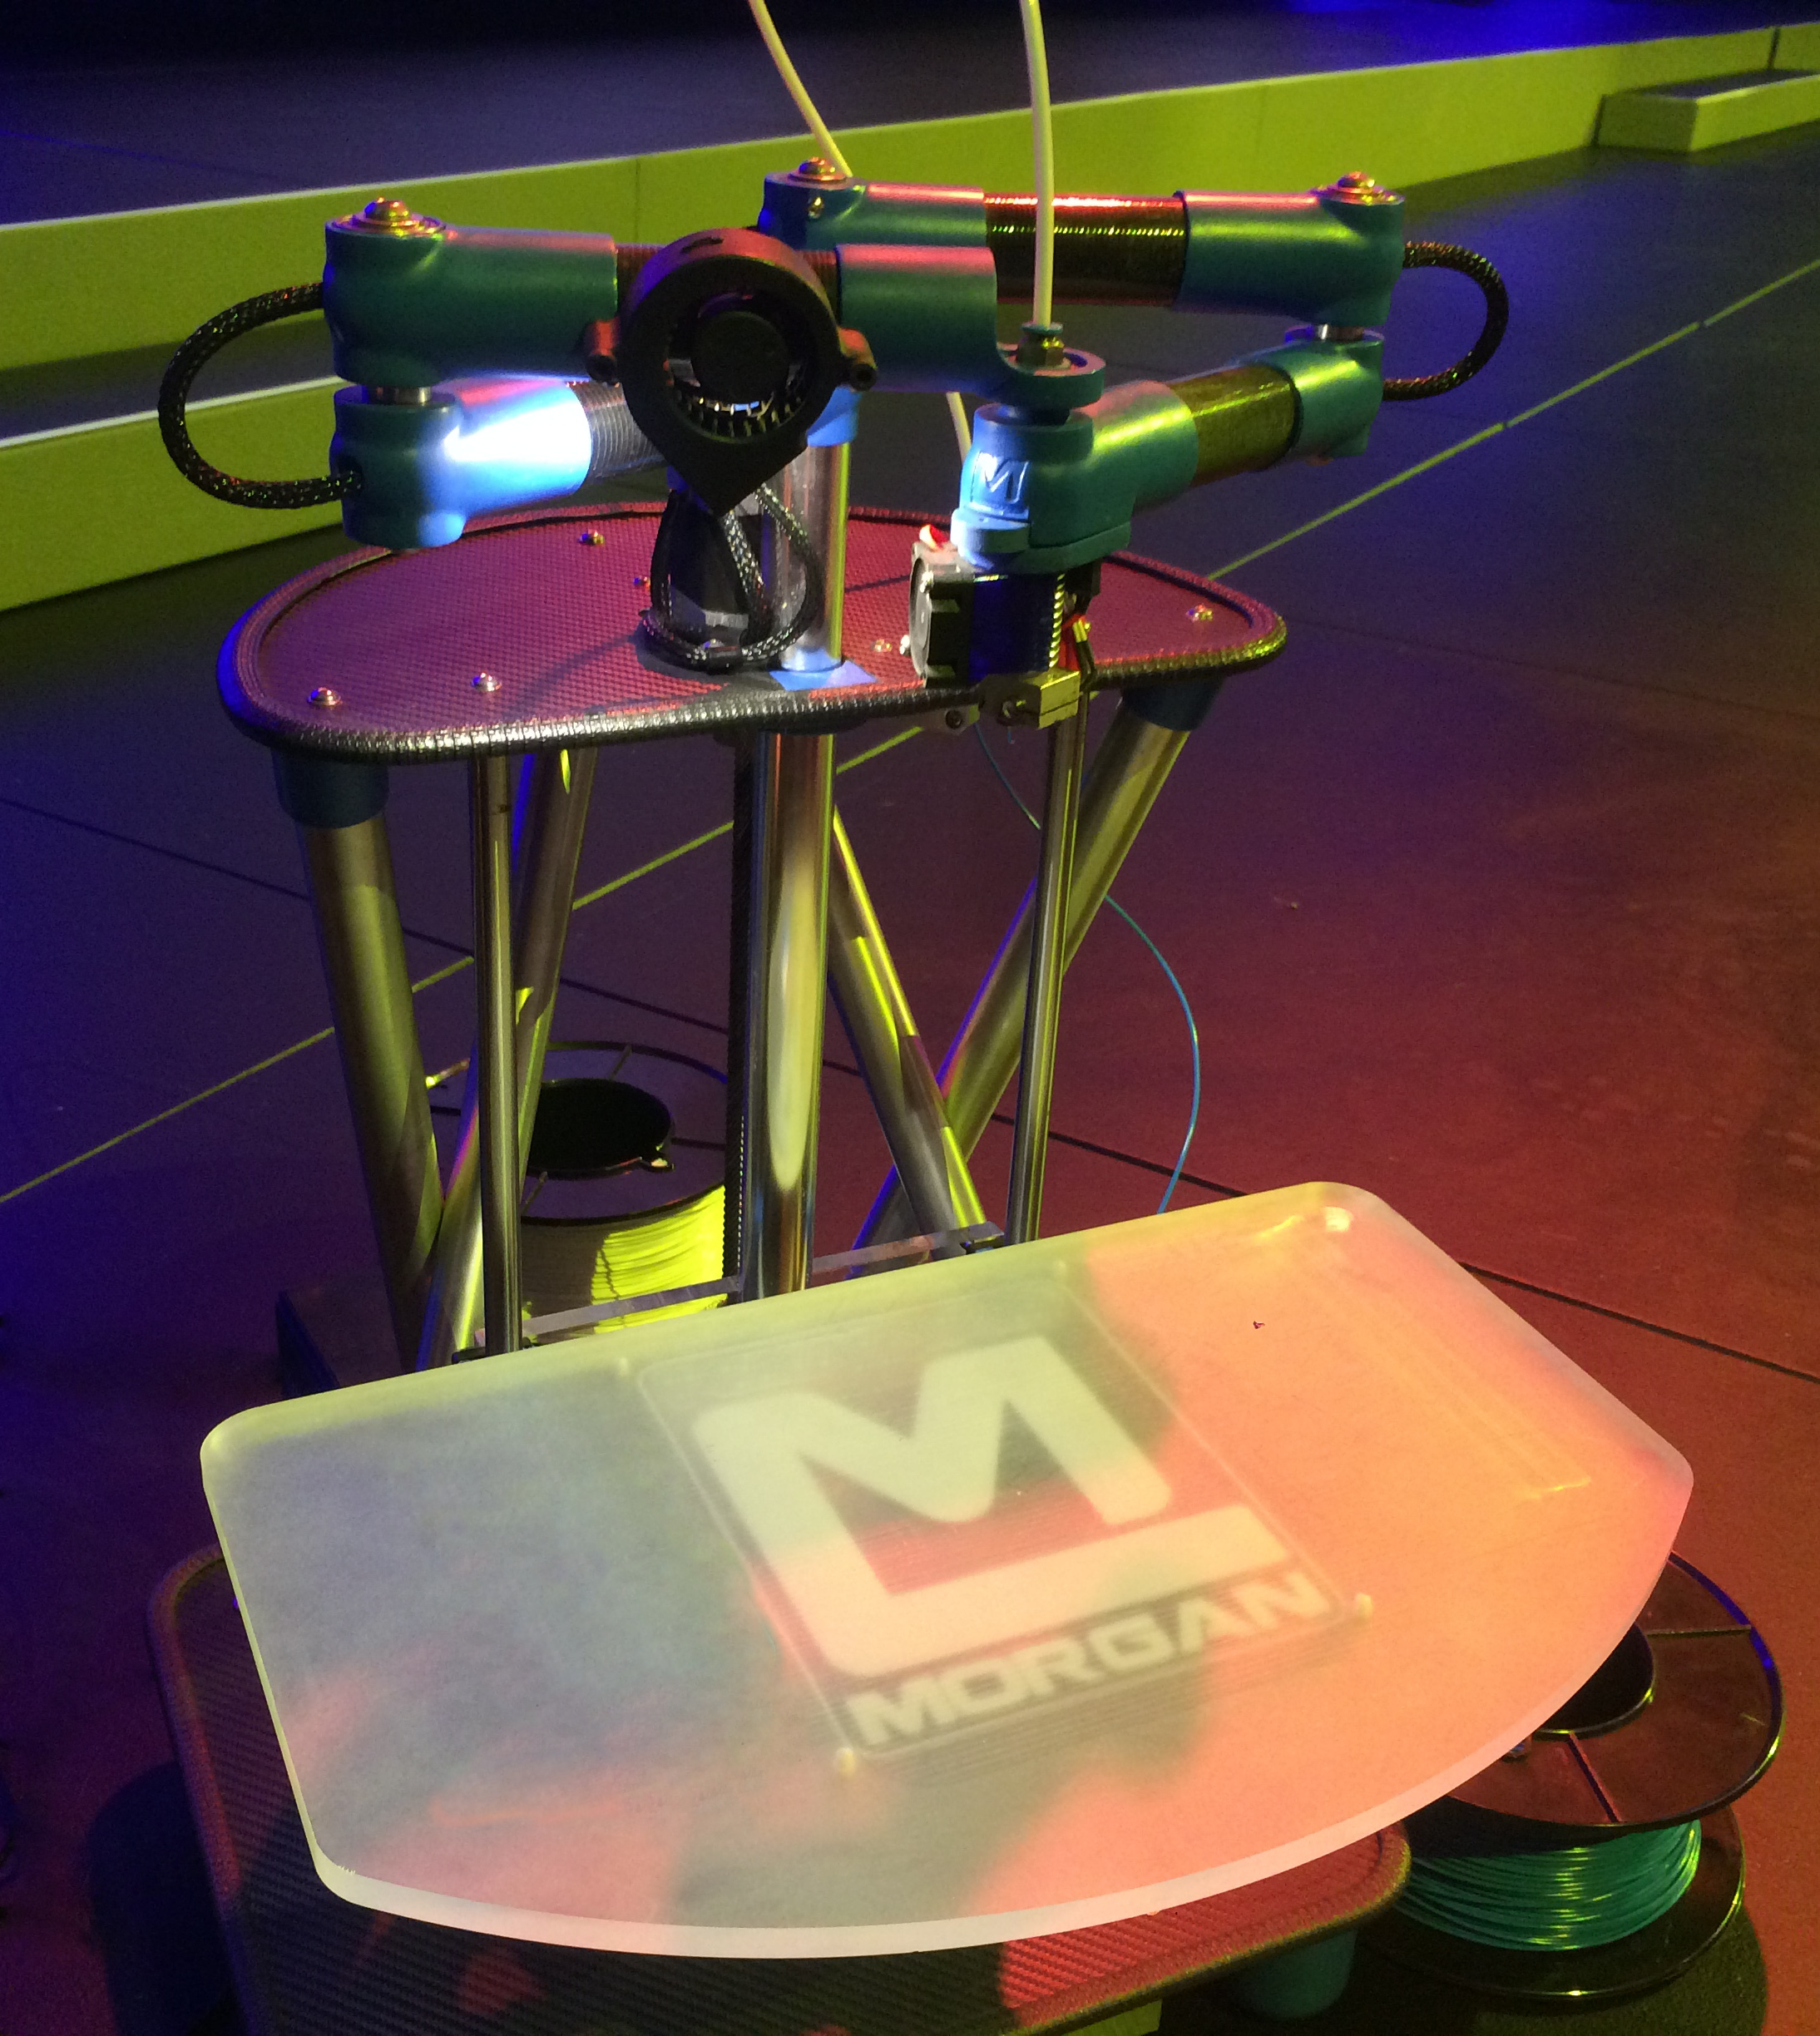
3D PrintersWe have a number of 3d printers at House4Hack and we are proud to be directly associated with the Morgan 3d Printer and the RoboBeast. The printers are free for use by our members.
|