Flashing BLHeli firmware on DJI Opto 30A ESC’s
Bit more of a technical post – quadcopters (and many other electric rotors and vehicles) use brushless DC motors. These act as three phase motors and in order to generate the required wavefroms, Electronic Speed Controls (ESC’s) are utilized.
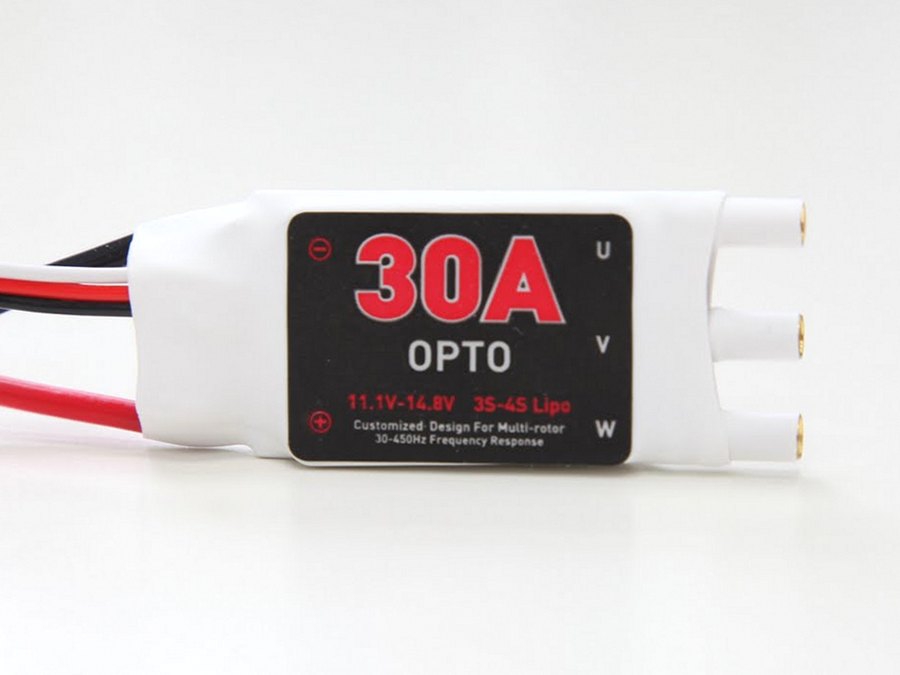
DJI OPTO 30A ESC is quite popular for quadcopters and looks like this when you buy it:
While doing some research on these, I came across an article on fpvlab on how to improve the performance of DJI OPTO 30A speed controllers
This sounded like a good way to learn more about ESC’s and I ended up compiling this short how to:
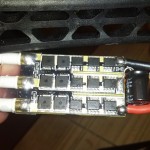
When you remove the white protective material, underneath is two metal strips and once you have removed these, the controller looks like this:
In order to experiment with the ESC’s and firmware, I needed a test bed – and again, Arduino to the rescue! Running a brushless motor through the ESC using Arduino is similar to running a servo, in fact you use the Servo library to generate the input to the ESC. I found this simple sketch online to arm and run a brushless motor – arming is a throttle procedure that protects the user from accidental motor operation. With many ESC’s this is simply zero’ing the input throttle:
// this uses the Arduino servo library
// caution, this code sweeps the motor up to maximum speed !
// make sure the motor is mounted securily before running.

#include  Servo myservo;

void arm(){
  // arm the speed controller, modify as necessary for your ESC
  setSpeed(0);
  delay(1000); //delay 1 second,  some speed controllers may need longer
}

void setSpeed(int speed){
  // speed is from 0 to 100 where 0 is off and 100 is maximum speed
  //the following maps speed values of 0-100 to angles from 0-180,
  // some speed controllers may need different values, see the ESC instructions
  int angle = map(speed, 0, 100, 0, 180);
  myservo.write(angle);
}

void setup()
{
  myservo.attach(9);
  arm();
}

void loop()
{
  int speed;
  // sweep up from 0 to 50% maximum speed in 10 seconds
  for(speed = 0; speed <= 50; speed += 5) {
      setSpeed(speed);
      delay(1000);
   }

   // sweep back down to 0 speed.
   for(speed = 45; speed > 0; speed -= 5) {
      setSpeed(speed);
      delay(1000);
  }
  setSpeed(0);
  delay(5000); // stop the motor for 5 seconds
}
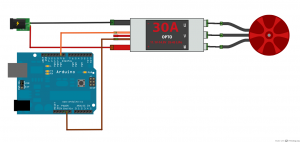
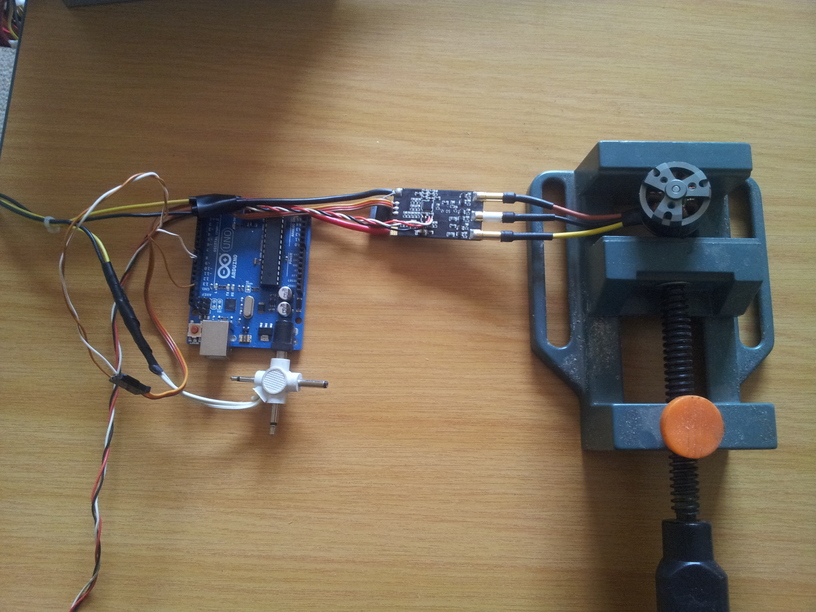
The code runs up the motor to 50% of maximum speed and then down again. This simple code allows me to make sure the flashed ESC is working post flashing. To run the sketch the ESC is connected to the Arduino as follows (image courtesy of http://robotic-controls.com/book/export/html/51):
For my power supply, I removed one from an old computer in the take-a-hack-leave-a-hack room. Important this needs to be a high current (10-20A) 12 V supply.
Now that I had a test bed, I could proceed to modify the firmware and then test it afterwards.
Hardware
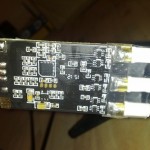
According to this article the binaries for the Turnigy Plush 30A ESC is compatible with the DJI Opto’s and looking at the physical boards, they look very similar.
In order to programme, you have to do a bit of soldering on the ESC – it has 4 pads and three of these are used as follows:
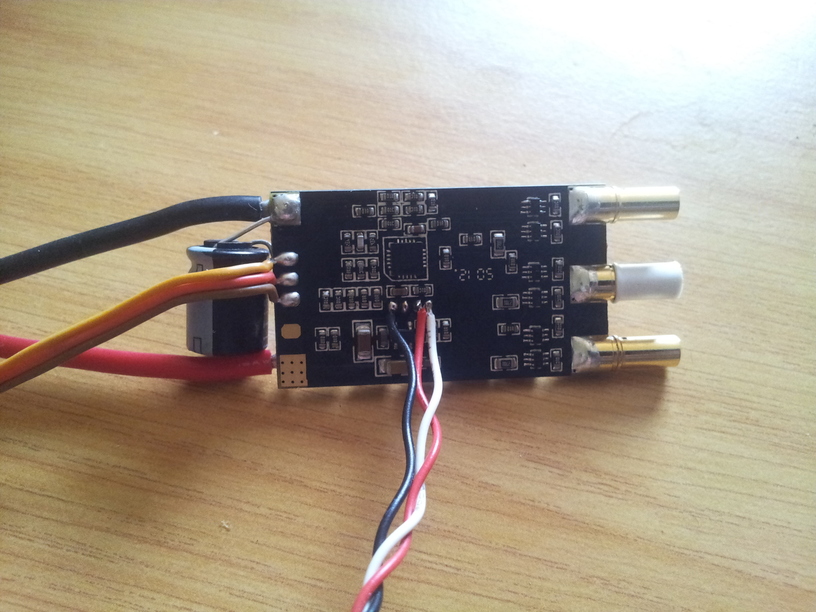
The colors of the wires are equivalent to those found in this guide for the Turnigy Plush 30A.
Software
- Turn your Arduino UNO into a programmer
- Flash the firmware onto the ESC
Step 1 is straight forward, I followed this tutorial. In short this is what you do:
Connect the Arduino UNO to your computer using USB and run the following command:
sudo /path/to/avrdude -C/path/to/arduino-1.0/hardware/tools/avrdude.conf -pm328p -c arduino -P/dev/ttyACM1 -D -Uflash:w:owsilprog_v120_m328p_16mhz_pb3pb4.hex
The hex-file is found as part of this download.
Now to get the firmware onto the ESC. At this point I had to boot-up my Virtualbox seeing that the programming software is in Windows (there is a QT based programmer available, and I will try that soon). Then it is just a matter of selecting the appropriate hex file and flashing to the ESC. In Virtualbox, I import the USB device and then run the OlliW’s BL Heli tool. The following screenshot show the selections for the ESC firmware:

Arming the ESC
The BLHeli has a different arming sequence to other ESC’s, and I had to modify my Arduino code above as follows:
void arm(){
  // arm the speed controller, modify as necessary for your ESC
  setSpeed(0);
  delay(3000); // wait for startup
  setSpeed(50);
  delay(1000); //push throttle mid way and wait a sec
  setSpeed(0);
  delay(1000); //push throttle to 0 and wait a sec

}
Here is a short clip of the ESC with the new BLHeli firmware in action:

Bit more of a technical post – quadcopters (and many other electric rotors and vehicles) use brushless DC motors. These act as three phase motors and in order to generate the required wavefroms, Electronic Speed Controls (ESC’s) are utilized. DJI OPTO 30A ESC is quite popular for quadcopters and looks like this when you buy…
Comments